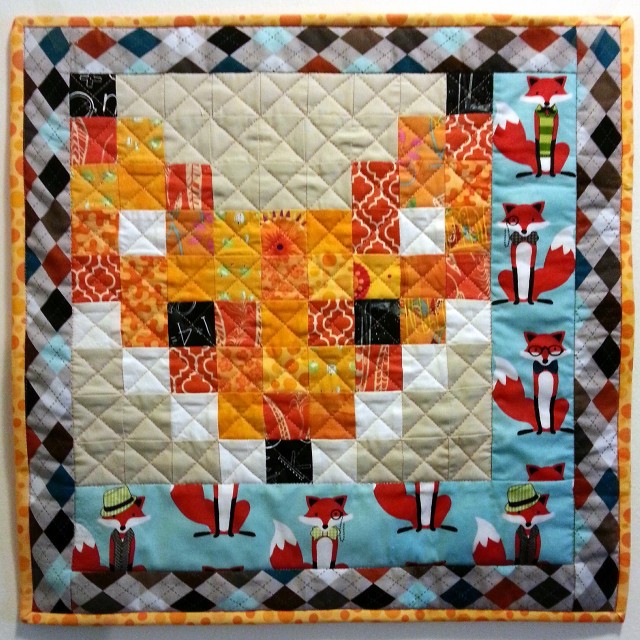
Fascinating…a retirement gift

Mr. Spock

Way back in the Spring, I saw on Craft a post about a totally awesome Spock quilt. Event though there was a tutorial on how to design the quilt, I thought, gosh, I wouldn’t know where to start.  I showed it to some co-workers who thought it was awesome and that it would be a great gift for our boss, who is a Trekkie extraordinaire.  But ethics being what they are, it really wasn’t appropriate for me to make it for him.

Fast forward to Octoberish when our boss announced his retirement in early December.  I immediately thought of the quilt and did a search to find the post again. Lo & behold, not only did I find the original post, but I found that Carol, the brains behind the blog Funthreads, had started a really amazing, simple to follow, quilt-a-long!  It made the whole project a lot less daunting.

Carol’s quit-a-long makes a twin-sized quilt in eleven parts. I thought a wall-hanging would be much more appealing to our recipient (and also easier for me to complete!), so I printed out each week of the quilt-a-long and wrote in new measurements for the pieces.  If you want to change the size of a quilt pattern, do not skip this step!  Have you ever tried to halve or double a recipe without re-writing the ingredient measurements? I ended up having to triple a batch of cupcakes just recently because I thought I could do the doubling math in my head as I went!  When halving quilt measurements, be sure to take into account the 1/2 inch for seam allowances. Remove the 1/2 inch from the original measurement, divide the resulting number in half, then add the half inch back in.  This will give you the correct (finished) measurement and your full 1/4 inch seam allowances all around.  Also remember that when you halve both the width and height you are essentially making a quilt a quarter of the size of the original.

I free-motion quilted my version of this pattern only in the black/dark parts to make Spock’s face stand out more.  I also stuck mainly with white/cream and black/grey for the darks and lights.  I have to say I am exceptionally proud of this project. Not only was my boss thrilled with his quilt, but I really enjoyed making it – always key.  I’m looking forward to designing my own quilt next, using the Funthreads tutorial – I’m thinking a Dr. Who quilt in TARDIS blue next?

Share

Baby’s first sewing project

Last night Caleb came out into the living room carrying one of his small chairs.
   M: Caleb, what are you doing?
   C: Mommy, I want to show you how much I love you!
   M: Ok…
   C: (climbing up on the chair and reaching as high as he can) I love you this much!
   M: Wow, that’s a lot! I love you too. How about we put the chair back now?
   C: I love you all the way to the moon and back!
   M: Well I love you all the way to the sun and back.
   C: Mommy, we can’t go to the sun because it’s too hot and we’ll get burned.

Baby's first sewing project.Caleb has been bugging me for a little while now to teach him to sew. On the surface, this is adorable, and oh golly gee, he wants to spend more time with Mommy! And wow, he wants to learn about what Mommy is doing! But when you really think about it, the 4-year-old kamikaze approach to life is not what I would call well-suited to the sewing room.

I’ve been working so hard on getting things ready for the Etsy store and other projects that I feel like I’ve been neglecting my mother/son bonding time. So this weekend I relented.

Our first project together was  this little stuffed felt heart.  I had to prop up the pedal so he could reach it.  Originally I thought he could sit on my lap and I could control the pedal, but I think getting to use the pedal was part of the appeal of sewing!  He had an amazing amount of control over the pedal, though.  You know, at age 4, those synapses are still building their neural pathways…when I said “stop” he would keep going for a few more stitches…but he never went fast enough that I got scared he would sew through his finger (One of my biggest fears in teaching a new person to sew).  And he seemed like he really, legitimately wanted to learn to sew, which is more than I can say for other people who have asked me for lessons.  I showed him how to leave a hole open on the edge and flip the heart inside out, how to stuff it and how to stitch it closed.

In hindsight I should have attached a little loop of ribbon to it and called it an ornament, but I didn’t.  It’s a little bit of a funny shape and so the 4-year-old boy that he is decided it was a boomerang!  He took it to school today so I’m sure to never see it again – hence the quickie cellphone picture.  At least I have something to treasure.  Of course, he was not happy about the picture either…

Share

Etsy! Etsy! Etsy!

Just a quick annoucement to say that, in time for Small Business Saturday, my Etsy shop is finally open!

Visit me here: http://hastyquilter.etsy.com/

And use the coupon code SHIP4FREE for free shipping!

friendship star

Share

NaNoSEWMo Check In

Quilts completed: 1
Quilted Pillow Covers completed: 7
Cosmetic bag completed: 7

Total items completed: 15

Total items currently in process: 6

Days left in the month: 8.
Items left to complete: 15.
Days left until Small Business Saturday when I plan to reopen my etsy store: 4.

I’m starting to feel really excited about Small Business Saturday!

Share

NaNoSEWMo math

Baby gifts completed: 2
Quilted Pillow Covers completed: 6
Cosmetic bag completed: 1

Total items completed: 9

Total items currently in process: 3

Days left in the month: 15.
Items left to complete: 21.
Days left until Small Business Saturday when I plan to reopen my etsy store (Did I forget to mention that?): 11.

So, I’m a bit behind, but I’m happy with my progress.

Share